Eating My Way Through

Panang Curry January 2, 2012

Filed under: Dinner — Nikki Wegner @ 12:14 am
Tags: ,

Happy New Years all! Once again I have been a failure at posting regularly…broken record I know. But hopefully 2012 will bring lots of opportunities to cook for friends and family and give me lots of fodder for the blog.

When I go out/order in Thai food, I usually order Panang Curry, not the healthiest of choices with its loads of creamy coconut milk, but I came up with a lighter version to satisfy my craving! By using light coconut milk and loading up on veggies and tofu you get all the great flavor and taste in a healthier package!

This recipe has a lot of sauteing, simmering and moving pieces, so make sure you pay close attention!

Panang Curry!

Panang Curry!

Panang Curry (own recipe)

1 Tbsp Canola Oil

16 oz Package Tofu, Firm, Diced

1 tsp Olive Oil

2 Shallots, diced

2 Garlic cloves, diced

2 Tbsp Peanut Butter

1 Tbsp lemon grass, diced

1 tsp ginger, fresh and grated

1 tsp coriander

1 Tbsp Thai Chili Paste

1 13.5oz can Lite Coconut Milk

½ can of water

½ Tbsp Fish Sauce

2 Tbsp Brown Sugar

1 Red pepper, chopped

1 Squash, chopped

1 Zucchini, chopped

¾ Package Rice Noodles (Thai)

Directions:

Heat canola oil in sauté pan over medium-high heat, add tofu and cook until brown, set aside.

While tofu is sautéing, prepare rice noodles according to package directions.

In a large skillet/wok heat 1 tsp olive oil. Add shallots and garlic, sauté.

Add in peanut butter, lemon grass, ginger and chili pepper, stir well.

Pour in coconut milk and ½ can of water, stir well.

Add in fish sauce and brown sugar, stir well.

Add tofu to sauce and let simmer to absorb flavor on low heat.

In the pan used for the tofu, add in a bit of olive oil, and cook red pepper, squash and zucchini. Add to sauce and let simmer for a few minutes. Serve sauce over rice noodles.

Yields 4-6 Servings


Roasted Eggplant & Tomato Tart October 15, 2011

Filed under: Uncategorized — Nikki Wegner @ 12:27 pm

For all my friends and family who actually read this blog…I am back! After a few month hiatus to quit my job, travel around Wisconsin and Europe, move to Chicago, pass a Calculus exam and begin Grad school, I am ready to start sharing my culinary adventures again with you all!

This summer I spent a good amount of time living with my parents, which I have to say was a pretty great gig! My dad has turned our backyard into a very bountiful mini-farm and most nights the three of us made dinner out of whatever was fresh/ready to eat that day.

Two of my dad’s most prolific veggies are eggplants and tomatoes. I personally think eggplant gets a bad rap too often, you can do so much with it if you just look around for a great recipe.

It was my night to make dinner, and though my dad was skeptical, I set out to make a Roasted Eggplant and Tomato Tart. And I am happy to report that he definitely went back for seconds!

To start, you prepare the crust for the tart.

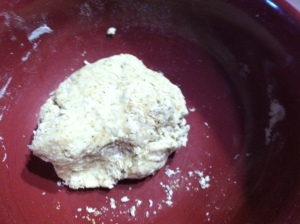
Tart Dough

Tart Dough

I promise it is an easy one, so don’t freak out! All you do is combine the flour, wheat germ, baking powder, pepper and salt in a large bowl. Then dig a well in the center of the dry ingredients, and add in the water and oil. Stir everything together until you have a soft dough, it will be a bit sticky. Turn the dough out of the bowl onto a lightly floured surface. Knead the dough a few times and then form into a circle. Cover that with plastic wrap and let it chill for 15 minutes.

While the dough is chilling, you can prep the eggplant. Slice the eggplant and arrange on baking sheets. Sprinkle the slices with salt and let stand 15 minutes. This will draw out the water in the eggplant, which you then pat dry.

Now back to the dough! One your dough has chilled, place it on your lightly floured surface and cover with nice big sheets of plastic wrap. Now using a rolling-pin, roll out the dough into a circle, about 10-11 inches. Once done, place the dough into a tart or pie pan coated with cooking spray. Make sure to prick the dough with a fork in a few places, honestly, not sure why you do this, but just do it!

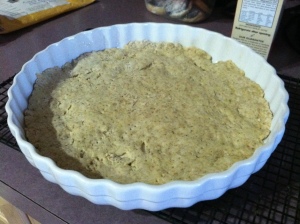
Crust ready for baking!

Crust all nice and crispy

Bake the crust for 10 minutes and let cool on a wire rack.

While the crust is cooling, brush your eggplant slices with olive oil. Pop them in the oven for about 20 minutes. Once they are done cooking, be careful as you stack them on top of each other on a plate. Cover them with plastic wrap and let them steam a bit.

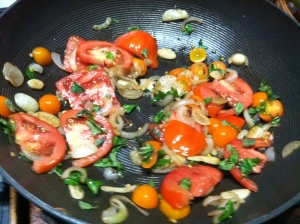
As the eggplants steam, you can saute your other veggies for the tart. Spray a large skillet with cooking spray. Start by cooking the garlic and onions for a bit. Then add in the tomatoes, salt, basil and oregano and cook for just a minute.

Tart filling

Tart Filling

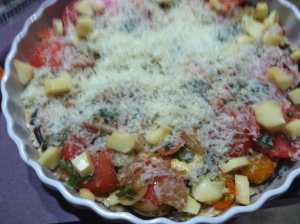
Now it’s time to assemble the tart! Sprinkle the tart with two tablespoons of shredded mozzarella and then layer on the tomato mixture and eggplant. Sprinkle the top of the tart with the remaining mozzarella and the Parmesan.

Tart ready for baking

Tart ready for baking

Bake the tart for just 10-15 minutes at 400º.

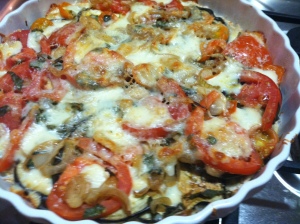
Roasted Eggplant and Tomato Tart

Roasted Eggplant and Tomato Tart

To serve, just cut into 8 pieces and plate!

Roasted Eggplant and Tomato Tart (adapted from Cooking Light)

Crust:

1/2 cup all-purpose flour

1/2 cup whole-wheat flour

1 tablespoon toasted wheat germ

1 teaspoon baking powder

1/2 teaspoon salt

1/4 cup water

1 tablespoon olive oil

Cooking spray

Tart:

1 eggplant, sliced into 1/4-inch rounds

3/4 teaspoon salt, divided

1/2 teaspoon olive oil

4 garlic cloves, thinly sliced

1 tablespoon chopped fresh basil

1 1/2 teaspoons chopped fresh oregano

2  tomatoes, thinly sliced (about 6 ounces)

1 red pepper, thinly sliced

1 small sweet onion, thinly sliced

1/2 cup (2 ounces) shredded smoked mozzarella cheese, divided

2 tablespoons grated fresh Parmesan cheese

Directions:

Preheat your oven to 400°.

For the crust, combine the flours, wheat germ, baking powder and salt in a bowl with a whisk. Make a well at the center of your mixture and then add the water and oil. Stir until you have soft dough. Lightly flour a flat surface and knead the dough lightly and then press the dough into a circle. Cover with plastic wrap and chill for about 15 minutes.

Unwrap the dough on plastic wrap and then cover with another sheet. Using a rolling-pin, roll the dough out into a 10-11 inch circle. Coat a tart pan with cooking spray and then put the dough in the pan and press into the bottom and sides. Poke the dough with a fork. Bake the crust for 10 minutes at 400°. Let cool completely.

To prepare the eggplant, arrange it on a baking sheet. Sprinkle with salt and let sit for 15 minutes. Pat the eggplant dry with paper towels then brush with olive oil. Bake at 400° for about 20 minutes. When done cooking, stack on a plate and cover the eggplant with plastic wrap; letting it steam for about 7 minutes.

While the eggplant is steaming, heat a large skillet and coat with cooking spray. Add in garlic, cook for 1 minute and then stir in tomatoes, pepper and onion, cooking until tender. Then remove from heat and add in basil and oregano. Sprinkle with sea salt.

To finish off the tart, sprinkle the cooled crust with 2 tablespoons of the mozzarella. Layer in the eggplant and vegetable mixture. Sprinkle with remaining mozzarella and parmesan.

Bake the tart for 10 minutes at 400° for 10 minutes until cheese is melted.

Yields 8 servings


Whole Wheat Pizza Dough March 6, 2011

Filed under: Dinner — Nikki Wegner @ 3:59 pm
Tags: , ,

Pizza is by far one of my guiltiest pleasures! I have a very hard time resisting it…no will power whatsoever. Combined with beer, it was definitely my downfall in college (it probably didn’t help that the only sport I played was beer pong.)

I figured it wouldn’t hurt to see if I could find a way to make it a bit healthier. Enter the whole wheat pizza crust, made easy by my mixer, which yes I am still obsessed with!

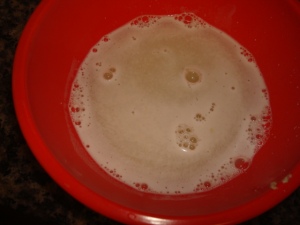
To start, you just combine a packet of yeast with some warm water, letting it sit until it gets a bit fizzy.

Yeast

Yeast

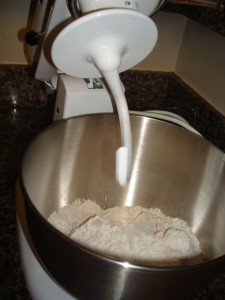
In the bowl of a stand mixer, add in the flours and the salt and mix using the dough hook on low-speed.


Flour mixing

Flour mixing


Once combined, slowly add in the yeast, kneading the dough for about 7-10 minutes. Once it is well-formed, add in the olive oil.

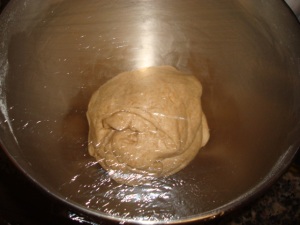
Take the dough and shape it into a ball, placing it back in the mixing bowl. Cover the bowl with plastic wrap or a damp towel, and let the dough rise for about an hour, until it is double its size.


Dough rising

Dough rising


Once the dough has risen, punch it down. You can use it right away, or wrap  in plastic wrap and place in the refrigerate overnight to make it extra yummy.


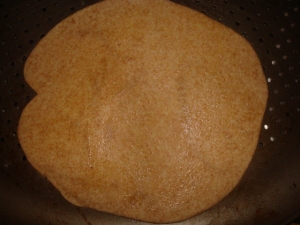
Pizza Dough

Pizza Dough


To finish off your pizza, preheat your oven to 375º and add your toppings of choice, then bake for 15-20 minutes!

I caramelized some onions with garlic and mushrooms and then added some goat cheese and prosciutto to mine, while my roommate took a more traditional route, topping hers with tomato sauce, mozzarella cheese and black olives…both delicious!


Caramelized Onion, Goat Cheese and Prosciutto Pizza

Caramelized Onion, Goat Cheese and Prosciutto Pizza


One good thing about this dough-you can freeze it and have it handy for a latter date! If you don’t want to use it all right away, just wrap it in some plastic wrap and aluminum foil and pop it in the freezer. It should take an hour or two to thaw, so make sure you take it out in time if you are craving it.

This is a great addition to my healthy cooking staples! A way to get my fix of a favorite, without as much guilt. And the ability to make my own mini pizzas has self-control built right in!

Whole Wheat Pizza Dough

1 packet of dry yeast

1 cup warm water

2 cups whole wheat flour

1 cup all-purpose flour

1 tsp of sea salt

1 tablespoon olive oil

Directions:

Add yeast to warm water in a medium-sized bowl, letting it sit for  about 5 minutes until it gets fizzy

In a stand mixer, with the dough hook attached, combine the flours and salt on low-speed

Slowly add in the yeast mixture and let the dough hook knead the dough until well combined, scrapping the sides of the bowl to make sure all the flour is getting mixed in

Kneading should take about 7-10 minutes, then add in the olive oil and continue kneading until combined

Form your dough in to a ball and place back in your mixing bowl

Cover with plastic wrap or a damp dish towel, and let the dough rise for about an hour – the dough should almost double in size

Punch down the dough and form into desired shape for pizza making!

For even better results put in the fridge and let it sit overnight

Yields 8 Servings (I made 8 mini pizzas)


Green & Gold Cake Balls February 15, 2011

Filed under: Treats — Nikki Wegner @ 5:15 pm

It has been a little over a week, but I am still basking in the glory of the Green Bay Packers Super Bowl Victory! I think the whole state of Wisconsin will cherish this one for a really long time. Obviously…my roommate Sarah and I were pretty excited about the game…

Go Pack!

Go Pack!

In honor of the festivities I made Green & Gold Cake balls. Ironically, I go the recipe from my friend Abby who’s a Steelers fan. Luckily we are still friends post-loss…I think.

Cake balls are definitely becoming a new “it” thing. I have seen them everywhere lately! They are really delicious, and definitely worth the multi-step process and extra calories (these don’t fit the blogs healthy eating theme, but I figured it doesn’t really count on Super Bowl Sunday, especially when the Packers are playing!)

Start with a boxed cake mix, whatever flavor you want, and prepare it according to the directions. I made chocolate and vanilla cake balls, using a yellow cake mix and a chocolate one!

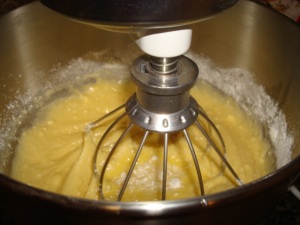
Cake Batter

Cake batter

As a side-note, my new mixer=amazing. How did I live without it before? (Haley I will be forever in your debt/hope you don’t read this regularly enough to see this, because I know you won’t let me forget it ;)!)

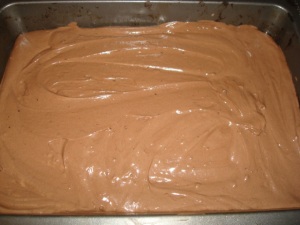
Cake ready for baking

Cake ready for baking

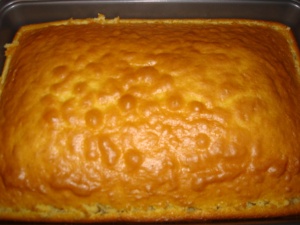
Baked Cake

Baked cake

Once the cake is ready, let it cool for 10 or so minutes. You can cut about a 1cm border around the edge and remove the crusty outside. If you want it to cool even faster, cut slits in the cake.

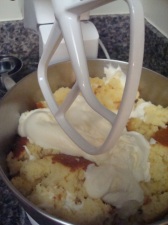
Take the baked cake and put it in a large bowl for mixing.Take a can of frosting and add it to the mixing bowl.

Cake + Frosting

Cake + Frosting

Simply mix everything together!

At this point, you need to exhibit some self-control and keep from eating the combo right away. You still have a few more steps.

Cover the bowl with plastic wrap, and stick it in your freezer for about 3 hours. After 3 hours, remove the cake/frosting mixture from the freezer and form into small balls. As you work, place them on a baking sheet lined with parchment paper. Put back in the freezer for about an hour.

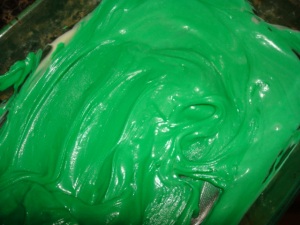
Now you are ready for the finishing touch, coating them in chocolate! Melt down bars of confectioners chocolate, I used Godiva’s white chocolate bars, and then added food coloring to the white chocolate to make it green and gold.

Food Colored Chocolate for Coating

Food Colored Chocolate for Coating

Using kabob skewers, I dipped/swirled the tops of the cake balls in the chocolate. Then I replaced them on the baking sheet and repeated the process.

Green & Gold Cake Balls

Green & Gold Cake Balls

Admittedly they did not turn out as pretty as ones Abby has made, but I think for a first try they were pretty good! And once you take a bite, you really stop thinking about what they look like and just focus on how yummy they are anyways!

In the future, I will definitely try different cake and frosting combos, maybe if I am ambitious even baking a cake from scratch or making my own frosting, but there is definitely no shame in taking the shortcut and using mixes/tubes of frosting!

Green and Gold Cake Balls

1 box cake mix (and called for eggs, oil, water, etc.)

1 can frosting (16 oz)

2-3 bars of confectioners white chocolate or lots of confectioners coating disks

Food coloring

Directions:

Make the cake according to the package direction

Let the cake cool for 10 minutes, cutting slits in the cake to cool faster

Cut about 1cm border around the cake, and remove the “crust”

Place the cake in a large mixer and add the can of frosting, mix well

Cover the bowl with plastic wrap and place in the freezer for about 3 hours

Remove the mixture from the freezer and roll into balls, placing them on a baking sheet

Freeze the balls for another hour

Melt confectioners bar or coating disks according to directions (I used a glass baking dish and microwaved 1 minute at a time on 50% power, stirring in between until the chocolate was melted because it burns really quickly if you aren’t careful!)

Add food coloring if dying the chocolate

Dip cake balls in chocolate, placing back on the baking sheet

Stick them in the fridge or back in the freezer until ready to serve!

Yields about 36 cake balls per batch


Curried Quinoa and Raita Salad January 30, 2011

Filed under: Lunch,Salad — Nikki Wegner @ 4:28 pm

I cook a lot on Sundays to have ready meals for the week. I try to mix it up, and make things that are healthy, yummy, refrigerate well and that I  won’t get bored with.

So I decided to try something new recently, and cook with curry powder. I know that I am a little late to the party on this one, but it wasn’t something I had ever cooked with before! This recipe called specifically for madras curry powder (found in the Indian food section of my supermarket), which is a bit spicier than regular curry powder, so if you want less heat, feel free to use the regular kind!

To start, you saute some garlic with curry powder in a medium saucepan (make sure you grab one with a lid). Then you add in your quinoa and some water. Bring everything to a boil.


Quinoa Boiling

Quinoa Boiling


Put the cover on the saucepan, reduce the heat to a simmer and cook for 16 minutes or until the water is absorbed.

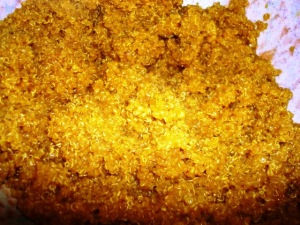
Remove the cooked quinoa from the heat and let it cool completely.


Quinoa

Quinoa


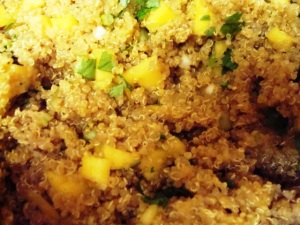
Once the quinoa is cooled, stir in the mango, green onions and cilantro.


Curried Quinoa Salad

Curried Quinoa Salad


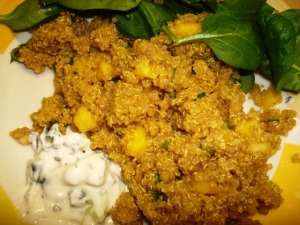
To make the raita, simply combine cucumber, mint and yogurt in a small bowl. Serve with some spinach for some extra greens!


Curried Quinoa and Raita Salad

Curried Quinoa and Raita Salad

This recipe would be great for a light weeknight meal, but I used it for a week of lunches. To make sure it stayed fresh I kept the spinach, quinoa and raita all separate, not combining until lunchtime.


Curried Quinoa and Raita Salad (Adapted from Cooking Light)

1 tsp olive oil

2 tsps Madras curry powder

1 garlic clove, crushed

1 cup quinoa

2 cups water

3/4 tsp kosher salt

1 mango, peeled and diced

1/4 cup green onions, thinly sliced

3 tbsp cilantro, fresh and chopped

1/4 cup cucumber, peeled and diced

2 tsp mint, fresh and chopped

1 (6oz) carton plain, non-fat greek yogurt

1 (5oz) package baby spinach

Directions:

Heat oil in a medium saucepan over medium heat, add curry and garlic and cook for one minute

Add quinoa and two cups water and bring everything to a boil

Cover, reduce heat, and simmer 16 minutes or until tender and water absorbed

Remove from heat, stir in salt and cool quinoa completely

Add mango, green onions, cilantro to quinoa and toss gently

In a separate small bowl, combine cucumber, mint, yogurt and stir well

Yields 4-6 servings


New Toy!: Kitchen Aid Mixer January 18, 2011

Filed under: Uncategorized — Nikki Wegner @ 3:13 pm

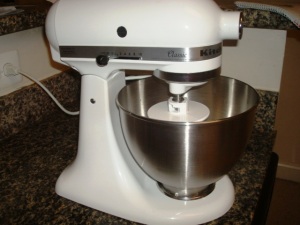
So this is slightly ridiculous, but I just had to post these pictures of my new KitchenAid mixer from my friend Haley! I seriously have the best friends ever.

I am the Maid of Honor in her wedding this summer, and as her gift to me, which I totally think is unnecessary and over the top but I will take it!, was this mixer. I always joke to people that the mixer is one of the main reasons to get married so you can register for it…and she remembered me saying that…not sure what that says about me, but oh well!

I used it for the first time yesterday to make whole wheat pizza dough, so I will let you know how it turns out.

New mixer!

New mixer!

So cool!

So cool!


Hot and Sour Soup January 13, 2011

Filed under: Lunch,Soups — Nikki Wegner @ 3:18 pm

With the New Year always comes resolutions. One of mine was to post to the blog more, and so far, I have admittedly been slacking. But you have to start somewhere!

My other resolutions aren’t necessarily super specific, just to recommit to running (I signed up for my first 10-miler in April with my friend Jamie!…eeks) and eating healthy. So to kick-start the new year I have been making a lot of yummy salads and soups to get in some extra veggies.

Soups are great for healthy lunches, as long as you go for broth based soups and avoid the heavy cream! This week I made an easy version of Hot and Sour Soup to bring in to work every day. This is totally a one-pot wonder of a meal, and after some time spent washing and chopping veggies, it is ready in minutes.

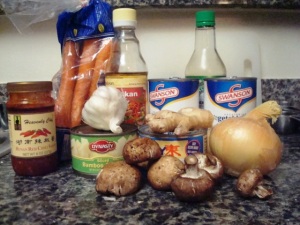
Ingredients

Ingredients

To start pour some vegetable broth  in a large stock/soup pot/dutch oven. Add in some rice vinegar, soy sauce and Thai red chili and garlic paste. Look at you, you’ve already made the base of the soup!

Next you just chop up some mushrooms, onions, carrots and bok choy and add everything to the pot. Also open up your cans of bamboo shoots and water chestnuts and drain them, then add these veggies to the pot as well. To add a bit more kick, mince some garlic and grate some ginger to add.

To finish it off I usually add in some cubed tofu (I’ve found the firm variety works the best). Then all you have left to do is bring the soup ingredients to a simmer over medium heat and let cook for about 5 minutes, stirring frequently.


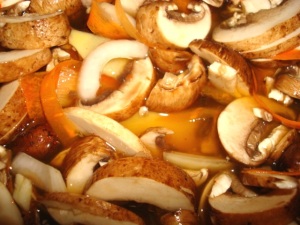
Hot and Sour Soup

Hot and Sour Soup


Once the soup is all done you can eat it right away, or like me, divvy it up into 5 portions for a week’s worth of lunches.

Each time I make this soup it turns out a bit different. Sometimes I have onions, sometimes I don’t. The bok choy was a new addition this last time I made it, and I loved it! This is a great soup for even the pickiest vegetable eater because you can mix and match everything. Also, if you are not a tofu fan, sauteing some chicken and adding it to the soup would also taste great. It’s up to you…cause you really can’t go wrong when it is so good for you and so easy to make!

Hot and Sour Soup

6 cups of vegetable broth (3 standard cans)

2 tbsp rice wine vinegar

2 tbsp low-sodium soy sauce

1 tsp Thai chili paste or Asian hot sauce (more if you want it spicier)

2 cups mushrooms (crimini or shiitake), sliced

1 can bamboo shoots

1 can water chestnuts

2 cups bok choy, chopped

1 cup carrots, chopped

1 small sweet onion, chopped

3 garlic cloves, minced

2 tsp ginger root, grated

16 oz firm tofu, cut in to cubes

Directions:

Prep all the veggies.

In a large soup pot combine the broth, vinegar, chili paste and soy sauce, and stir until well mixed.

Add in the mushrooms, bamboo shoots, water chestnuts, bok choy, carrots, onion, garlic, ginger root  and tofu.

Bring everything to a simmer and cook for 5 minutes, stirring often.

Yields 5 servings (about 2 cups)


Salted Caramel Volcano Cookies December 23, 2010

Filed under: Baking,Treats — Nikki Wegner @ 12:49 pm

One thing I love about my office is everyone’s general love and celebration of baked goods, which I of course can get behind! Every year around the holidays someone organizes “The Cookie Smackdown” where everyone brings in cookies to be judged, eaten and awarded. For the past two years I have missed it for some reason, so this year I was determined to bring it!

I have always been obsessed with salty sweet combinations, and recently it has been salted caramel. Not sure why, but I have always wanted to try making my own caramel too. So after some online searching for recipe ideas and insight in how to exactly make my own caramel, I came up with this recipe for what I hoped would be a winning cookie,  Salted Caramel Volcano Cookies (aka chocolate shortbread cookies with caramel spooned into the center and sea salt dribbled on top)! We were supposed to try to come up with semi-creative names for our cookies…not sure if that cuts it but it works!

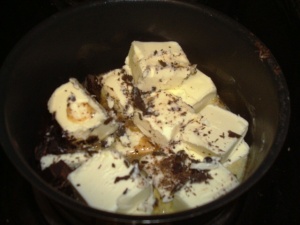
To start, I melted way too much butter with baker’s chocolate. (Since we are dealing with a competition here and cookies, I figured I would just forgo the whole healthy cooking thing this time around!)


Melting butter and chocolate

Melting butter and chocolate


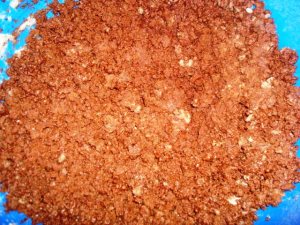
Once you are done melting the two ingredients together, pour into a large bowl with sugar and unsweetened cocoa. Using a hand mixer on low, otherwise you will splatter everywhere, mix until combined and then add in some vanilla and mix a bit more.

Then you add in some flour and salt (which you sift together before), mixing until the dough is combined.


Cookie Dough

Cookie Dough


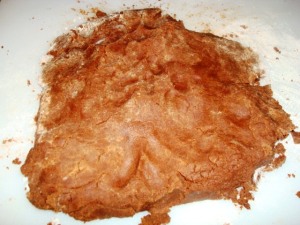
Next, flour lightly a large cutting board. Dump the dough onto the cutting board and knead together into a solid lump of dough. I was going for a square and I kind of got there…but not really.


Dough prepped for chilling

Dough prepped for chilling


You wrap the dough in plastic wrap, then chill for about 30 mins.

Once the dough is done chilling divide the dough into 1 1/4 inch balls and place them on a baking sheet. Then using your knuckle or the backside of a teaspoon, dent a hole in the middle of the cookies to make an impression, this is where you will pour the caramel in later. You can use your fingers to mold larger craters if needed.

Bake the cookies for 10-15 minutes. Remove them from your baking pan to cool.


Cookies!

Cookies!


While your cookies are cooling, you can make the caramel. Make sure to have your ingredients measured and at the ready, as once the sugar starts to brown, the process goes super quick!

Combine the sugar and water in a small sauce pan and heat over medium-high heat.


Sugar and Water

Sugar and Water


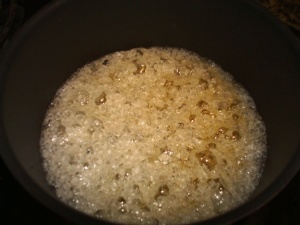
It will take a bit, but the mixture will start to boil, then all of a sudden start to turn a brownish color, when it does, slightly shake the pan to distribute the sugar evenly, do not stir before that point.


Carmelizing starting...

Caramelizing starting...


Once the mixture is a nice caramel color throughout, whisk in pieces of butter until well combined. Next, whisk in the whipping cream quickly to finish the caramel.


Caramel

Caramel


Your cookies should be cool by now, so using a teaspoon, spoon caramel into the craters you created in the cookies. Then sprinkle a bit of sea salt on the caramel. You can eat the cookies right away when the caramel is super gooey, or you can let them sit for a few hours and the caramel will harden a bit.


Salted Caramel Volcano Cookies

Salted Caramel Volcano Cookies


I am happy to report that though the cookies did not win the best in show category, they did win an award for being the favorite cookies of one of the firm’s partners, and my office mate Ashley and I won mixing spoons for them…so can’t be disappointed with that!

Salted Caramel Volcano Cookies (adapted from A Cozy Kitchen)

Cookies:

1 1/2 sticks unsalted butter, room temperature

1 oz unsweetened baker’s chocolate, finely chopped

1/2 cup sugar

1/4 cup unsweetened cocoa

1 tsp vanilla

1 3/4 cup all-purpose flour

1/8 tsp salt

Caramel:

1/2 cup granulated sugar

2 Tbsps water

2 1/2 Tbsps butter, room temp, cut into small pieces

1/4 cup heavy whipping cream, slightly warmed (20 secs in microwave)

Directions:

In a small saucepan melt butter and chocolate together

In a large bowl, combine the sugar and cocoa

Pour in the melted chocolate and mix on low-speed, add vanilla

Sift flout and salt together in a separate bowl

Slowly add flour to the large bowl and mix with the electric mixer on low to combine until well mixed

On a lightly floured surface, mold and knead dough into a square

Wrap in plastic wrap and chill for 30 minutes

Preheat your oven to 350º

Remove dough from fridge and form into 1 1/4 inch balls, placing on sprayed cooking sheets

Press indentations into the cookie dough and mold with fingers if needed

Bake 10-15 minutes then remove cookies from pans to cool on wire racks

While the cookies cool, heat the sugar and water on medium-high in a small sauce pan

Bring the mixture to a boil and watch it begin to turn brown, when it does shake the pot to evenly distribute the sugar

Once the mixture is totally brown, whisk in the butter until well combined

Next vigorously whisk in the warmed whipping cream until combined

Spoon 1 tsp of the finished caramel into the center of each cookie, top with sea salt

Yields about 16 cookies per batch


Fig and Goat Cheese Scones December 17, 2010

Filed under: Breakfast,Sides,Treats — Nikki Wegner @ 4:51 pm
Tags: ,

Being from Wisconsin I think it is inherently mapped in our DNA that we have to love cheese. I am a cheesehead, I accept it and embrace it. I especially am a sucker for cheese plates at restaurants or parties, I really have a hard time restraining myself. When I was visiting two of my best friends in New York City Maddy took me to The Dove Parlour, this beautiful little bar that had one of the best (and most affordable) cheese plates. After we stuffed our faces with a variety of delicious cheeses, an assortment of bread slices, apricots, jam, nuts, figs etc., I was inspired to make these fig and goat cheese scones.

These scones are a great savory, yet sweet treat. I love making a big batch and freezing them, heating them up for breakfast or eating with a hearty soup for lunch. I have made these a bunch of times in the past, but this time I tried to make them a bit healthier by using light butter and whole-wheat flour, and I splurged and bought some fresh chevre from my fave cheese shop in DC, Cowgirl Creamery. So Good!

The great thing about this recipe is that you can use fig jam (which I use here), fresh or dried figs, whatever you can find/is in season. You can also substitute in other fruits if you prefer, I think apricots would taste great too.

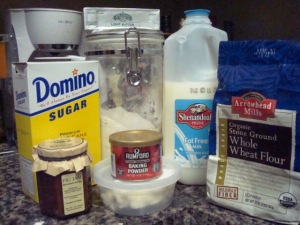
To start, gather all your ingredients and preheat your oven.


Ingredients Assembled!

Ingredients Assembled!


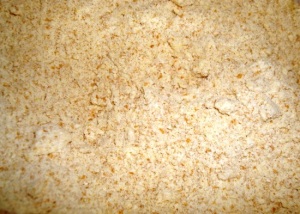
In a large bowl combine your dry ingredients, the two-types of flour, baking powder, salt and sugar.


Dry goods

Dry goods


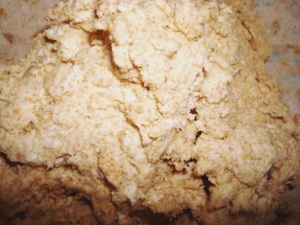
Then drop in the butter pieces, working them into the flour mixture with your fingers. Once mixed in, add the milk and goat cheese and stir until the dough comes together. You will end up with a slightly sticky ball of scone dough.


Scone Dough

Scone Dough


Next, simply mix in the fig jam or fresh/dried figs. Then take the dough and form into 12 2-inch balls of dough. Place them on baking sheets you sprayed with cooking spray and slightly flatten.


Scones for baking

Scones for baking


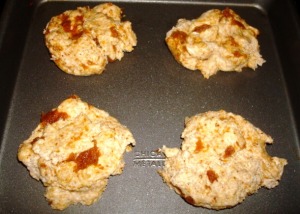
Bake the scones for 15 minutes, or until their tops are slightly brown, and remove from the oven. Take off the baking pans and let cool on a wire rack before enjoying! If you want to freeze some, let them completely cool before wrapping for the freezer.


Fig and Goat Cheese Scones

Fig and Goat Cheese Scones


These scones are super easy and delicious! As a bonus the dough base is a great starting point for any scone recipe you may want to experiment with. If you are going for something a bit sweeter I would probably add a bit more sugar, not a lot, but just a bit. I did that with a batch of blackberry scones, and though they turned out purple, they were pretty yummy.


Blackberry Scones

Blackberry Scones


Fig and Goat Cheese Scones (Adapted from Yum Sugar)

1 cup all-purpose flour

1 cup whole-wheat flour

1 Tbsp baking soda

1/2 tsp salt

3 tsp sugar

1/3 cup light butter, chilled and cut into large pieces

1/2 cup low-fat milk

1/2 cup crumbled goat cheese (4 ounces)

6 Tbsp fig jam or 3/4 cup fresh or dried figs

Directions:

Preheat oven to 400º

Spray baking sheets with cooking spray

In a large bowl combine the flour, baking powder, salt and sugar by mixing

Add in butter gently using your finger tips to rub the butter into the flour mixture

Add the milk and goat cheese, stirring until dough comes together in a slightly sticky ball

Mix in fig of whatever type you are using

Divide the dough into 2-inch balls and place on the baking sheet and flatten slightly

Bake 15 minutes or until the tops of the scones are slightly browned

Let cool on a wire rack

Yields 12 scones


Cooking With Friends: Baked Falafel and Apple Cider Crisp December 13, 2010

Filed under: Cooking With Friends,Dinner,Treats,Veggies — Nikki Wegner @ 6:23 pm

One of my favorite things about cooking is how it brings people together. I always feel so warm and fuzzy inside after cooking with friends (though it could be the wine we usually consume!)

My friends Jen, Frank and I had talked forever about making dinner together one night, and we finally got around to it recently! Frank offered to host and get the groceries and Jen and I took care of the cooking.

There were a few challenges to planning out the menu as one of us has a dairy allergy/leans vegan and Frank is, as his name suggests a boy, and not to stereotype men but he doesn’t exactly have a fully stocked kitchen when it comes to gadgets, pans, pots, even knives. When asked if he had a food processor, Frank responded with, “What’s that?” and I had to send him a picture. But we worked through all this and made a great meal!

For dinner we decided on making falafel and then serving it with pita, a yogurt sauce, salad and a vegan apple crisp for dessert. To give the falafel a healthy update, we wanted to give baking instead of frying it a shot and after a lot of searching, I found a great recipe on a new fave blog Eat Real. Turns out, it still tastes great and it’s a lot better for you!

To start the falafel, get out your food processor! Place the garlic, cilantro, parsley, chickpeas and bread crumbs in the bowl and cover, pulsing a few times to chop. Then add a tablespoon of lemon juice and pulse a few more times. Add the baking powder, cumin, salt, some tabasco and more lemon juice so the blades don’t get stuck/too weighted down and then mix until a paste-like consistency.
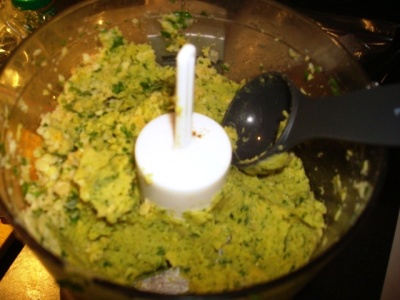
Falafel Mix

Falafel Mix

Prepare your baking sheets by lining them with foil and brushing them with olive oil. Using a tablespoon measuring cup, scoop out some of the falafel mix and then form it into patties with your hands. Then arrange the patties on a baking sheet and brush their tops with oil too.
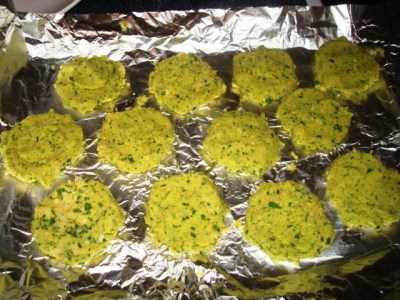
 

Falafel ready for baking

Falafel ready for baking


Bake the patties for about 15-20 minutes, flipping them half way through. Remove them from the oven with the tops are nice and browned and let them cool for a few minutes.

While the falafel was baking we whipped up the yogurt sauce to go with it and prepped the apple crisp for baking.

For the yogurt sauce all you do is combine non-fat greek yogurt, fat-free sour cream, minced garlic, dill, lemon juice, salt and some chopped cucumber in a bowl and mix well! Place it in the fridge to stay cool until the falafel is done.
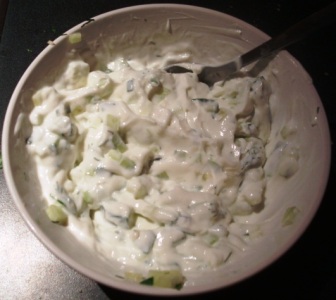
 

Tzatziki (Greek Yogurt) Sauce

Tzatziki (Greek Yogurt) Sauce


Then we prepped the crisp! We timed everything so that while we ate our main course the apple crisp baked.  This apple crisp is so easy! And by using margarine instead of butter, also vegan friendly. I have made a similar crisp/crumble using rhubarb in the past and it always turns out yummy.

Once again you will need your food processor. In the bowl, you combine some flour, sugar, brown sugar and margarine/butter. You pulse a few times until you have a crumbly consistency. Set this mixture aside.

Then, in a large bowl, combine chopped and peeled granny smith apples with a bit of apple cider, sugar, lemon juice, flour and cinnamon. Stirring until well combined.

Spray an 8-inch square pan with cooking spray and pour the apple mixture into the pan. Then sprinkle it with the crumb topping.
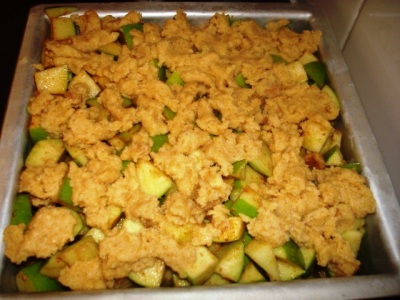
 

Prepared Apple Crisp

Prepared Apple Crisp


Once the falafel was done baking, we popped the crisp in the oven and got ready to eat!
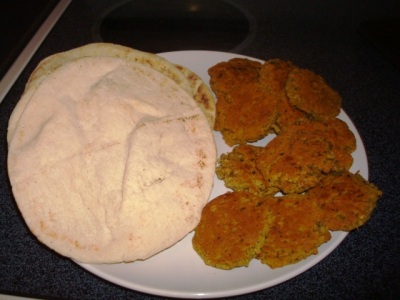
 

Baked Falafel with Pita

Baked Falafel with Pita


I have to say, our spread was pretty great!


Yum!

Yum!

After we had thoroughly demolished the falafel, pita, salad, hummus and veggies, wine, etc….we somehow managed to have room for dessert!
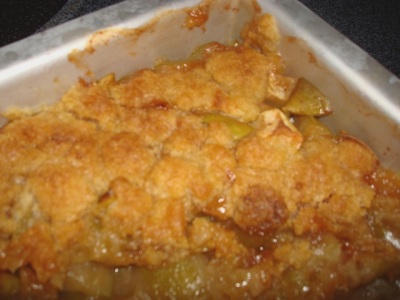


Apple Cider Crisp

Apple Cider Crisp


This was a great meal to make with friends! We tried something new, but at the same time, it wasn’t too difficult that we couldn’t execute it all together and without killing each other/taking hours. I definitely recommend the falafel recipe for a healthy update to a favorite and the crisp is always a good go to easy dessert!

Baked Falafel with Tzatziki Sauce (From Eat Real)

Falafel:

2 cloves garlic, quartered

1/4 cup cilantro, chopped

1/4 cup parsley, chopped

2 cups (16 oz) chickpeas

1/2 cup breadcrumbs (I used the panko variety)

2 Tbsp lemon juice, fresh

1 tsp baking powder

1 tsp cumin 1 tsp salt

1 tsp tabasco sauce, red or green kind

Tzatziki Sauce:

1/2 cup non-fat yogurt

1/2 cup fat-free sour cream

1 large garlic clove, minced

1 Tbsp fresh dill, chopped

1 Tbsp lemon juice, fresh

1 cucumber, finely diced

Salt to taste

Directions:

Pre-heat the oven to 450º

Place garlic, cilantro, parsley, chickpeas and bread crumbs in your food processor

Pulse a few times to chop everything up

Add 1 Tbsp of lemon juice and pulse a bit more

Then add the baking powder, cumin, salt, tabasco and additional lemon juice

Pulse the mixture until it has a nice and paste-like consistency

Line a baking pan with aluminum foil and brush it with olive oil

Taking a large tablespoon, scoop the mixture and form it into patties

Place the patties on the baking sheet and then brush the topes with olive oil so they don’t burn

Bake the patties for 15-20 minutes, flipping them half-way through, until they are golden brown on top

While the patties are baking, make the sauce by combining all the ingredients in a bowl and mixing well

Cover the sauce and chill in the fridge until ready to serve

Remove the patties from the oven when they are done and let cool for a few minutes before serving with pita, sauce and other veggies

Yields 4 servings
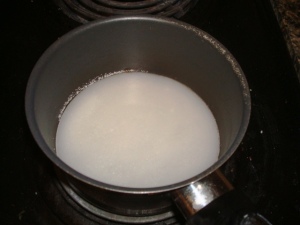
Apple Cider Crisp (Adapted from Weight Watchers)

Crumble:

1/2 cup flour

1/4 cup sugar

1/4 cup brown sugar, packed

1/4 cup butter or margarine, chilled and broken into smaller pieces

Filling:

7 granny smith apples, peeled and cut into chunks

1/3 cup apple cider

2 Tbsp sugar

1 Tbsp lemon juice

1 Tbsp flour

1 tsp ground cinnamon

Cooking Spray

Directions:

Pre-heat oven to 375º

Combine crumble topping ingredients in a food processor and pulse until crumbly

Set aside

Combine filling ingredients in a large bowl and toss gently until everything is well coated

Spoon mixture into a 8-inch square baking pan sprayed with cooking spray and top with crumble mixture

Bake for 40 minutes

Yields 8 servings